December 30, 2009

{Projects: Burp Cloths}


Ok, the next little project I made for Brooke's gift bag was patterned burp cloths. Sure they get spit up on, wipe snotty noses and clean grubby little hands, but at least doing that stuff with something cute is bound to keep your spirits high in the midst of all the...ahem, uncleanliness.

I could post a tutorial on how to make this (believe me it's simple) but i'll spare myself the work and link you to a tutorial that's already done (and so easy to follow). Plus, it has pictures, and tutorials with pictures are a good thing.

This tutorial is courtesy of Chick Pea Studios, and you can view it here.

December 23, 2009

{Projects: Washcloths}

Ok, first off is a rather simple project--washcloths. I never thought of making my own washcloths until I stumbled upon them one day while browsing Etsy. Etsy is such a great place for getting ideas. When I started thinking about washcloths (deep, I know) I realized that I don't really have any that I like, er..say, stand out to me enough to think twice about them. Washcloths don't really come in cute or fancy patterns, but are usually a rather dull square of terrycloth. In my opinion...Boring! If you can cut a piece of fabric into a square and can sew a straight line using a sewing machine then you're well on your way to making some attractive washcloths.

For these which I included with Brooke's gift I used chenille and cotton. The chenille I got on sale at Joann's Fabrics for %50 off, and the cotton I used was plain quilting cotton from a Michael Miller line. After pricing them out they cost merely cents to make. Ok, cute and cheap...I like it!

I don't have a tutorial per say for this project, but it's so easy I'm sure you can follow directions without pictures.

1. cut (1) 7.5" inch square of chenille.
2. cut (1) 7.5" inch square of patterned cotton.
3. match squares up right sides together. This means that the backsides of each of the fabrics are on the outsides.
4. pin around to hold in place.
5. sew 1.4" around the whole square leaving a 2" inch opening.
6. turn your square right side out.
7. fold in the 2" inch opening and pin closed.
8. top stitch 1.4" inch around the square. topstitching is just sewing on top of your finished good. (Topstitching helps with durability, gives a finished look to your item and will close the opening you left.)
9. you're done!

The finished washcloth will be 7x7 inches. Perfect for using yourself, or on a little one!

December 21, 2009

{Project: Gifts!}

My friend Brooke is just weeks away from having a little baby boy! I'm so excited for her, and decided to make up some things to help welcome baby Evan into the world. Over the next few days i'll post the individual items and the links to the tutorials I used to create them. To start the gift giving off I have a blue tag from Bake It Pretty with a note on one side and a short poem on the other.

"Oh the things you'll need most everyday...these will help with the messes along the way"

The items I made include most of the things I've been planning to make for my own upcoming addition from The List I've been compiling and blogged about recently. It was a good opportunity to do a run through of the tutorials before I really start cranking some of these things out.
For Brooke I made: 1 wipes case, 4 washcloths, 3 burp cloths, 2 paci clips, 2 bibs, and the cutest little stuffed owl. I'll share the specifics soon and the tutorials I used to make them. Here are some pics of the goodies all tied with ribbon.

{Happy Monday}

A sweet little package of goodies showed up on my doorstep today. Of course I was eagerly awaiting their arrival all weekend. A half a yard of Amy Butler Tangerine Full Moon fabric, and the Amy Butler Gum Drop Pillow pattern. After unsuccessfully trying to find a knock off pattern online, I caved and bought the actual thing. I'm planning on making one for nursery. I ordered my goods from Fabric.com, a place that I frequent often for their low prices and quick shipping (not to mention they always have a coupon going). It's hard to not get something while browsing their site. I hope everyone else had a happy Monday!

December 10, 2009

{Baby On the Brain}

Ok, so lately all i've been thinking about is BABY! We just had our 16 week ultrasound appointment and got to see our little one squirming around. It actually looks like a real baby! (What else it would look like, i'm not so sure). I guess it just seems so much more real seeing all the parts formed. No more peanut shaped blob here, we're all complete, 2 arms, 2 legs, a little nose and the cutest little feet and toes showed up on the screen. The baby was breech so we were unable to see what the gender is, hopefully in the next few weeks it'll shift and i'll know whether to start sewing and crafting for a boy or a girl. Which leads me to the list. Yes, it's growing daily with all the projects I have high asperations for completing in the next 5 months. So far i've mentally committed to completing the following:


The list:

Nursing cover
Wipes case
Blankets
Crib Bumper (Amy Butler pattern)
Matching Pillows
Mobile (bird?)
Crib skirt
Burping clothes
Blocks
Paci clips
Fabric shoes
Appliqued onsies
Car seat/stroller cover
Car seat strap covers
Gumdrop pillow for nursery (Amy Butler pattern)
Birdie Sling Bag (Amy Butler pattern)

Wow, I better get busy huh? I can't wait to get started! For now i'll leave you with this, and post some more pics later.

November 28, 2009

{Thanksgiving!}


Hello! It's been some time! The baby and I are out of our first trimester, and I hear the relief from sickness is fast approaching us. We'll see I suppose. I've been keeping it very low key, not to mention that school is almost over for the semester, and I am now working full time. Very little extra time for blogging, and experimental crafting and baking. I'm looking forward to when school is out, and I can devote my evenings to creating things other than term papers.

I thought I'd share my favorite recipe for cranberry sauce while I patiently wait for my life to be a little less crazy. I miss this blog. I miss crafting and sewing and baking. Siiigggghhh....

Well, onto the recipe. It really is soooo easy and delicious! I have never had the canned gelatinous jello-mold looking cranberry sauce, so there is no comparison on an actual level, but I can almost guarantee that this is 10 million times better, yeah...I'd bet some serious money on that.

Ingredients
1/2-1 cup sugar (depending on how sweet you like it)
1 package fresh cranberries
Juice of 1 orange
Zest of 1 orange
1/2 cup water

Directions
Place 1/2 cup sugar, water, and the juice of the orange together in stove top pan, heat over medium flame until sugar has dissolved in the water. Add the package of cranberries and the orange zest and cook over a low simmer (medium heat) for 7 to 10 minutes or until all of the cranberries have burst and the sauce is thick and deep red. Taste and add additional sugar if you like your cranberry sauce on the sweeter side. Serve warm or at room temperature.

October 24, 2009

{Hello! It's been a while!}

Ok...wow. It feels like its been FOREVER! And well frankly it has....my sincere apologies. The last 2.5 months have been full of surprises and anxious waiting, feeling queasy and oh so tired. The verdict? I'm officially pregnant! Wow, what an amazing thing, but it sure has tuckered me out. (All you fellow preggos and mom's know what I'm talking about).

I'm due in May, and Travis and I are very very excited for our new addition. I suppose that my nesting, crafting and sewing will become obsessive once I'm out of the first trimester and don't feel as if I'm going to throw up at any given moment. I can't wait to get busy sewing and crafting. Not to mention the holidays are right around the corner, and we all know that brings out the glitter and baked goods. I can't promise any regular posts for the next few weeks, but once I'm feeling better i'll be back on top of my blogging game! I promise!

September 13, 2009

{Goodbye Summer, Hello Autumn...}

My favorite time of the year is fast approaching. About this time something starts to change in the air, the summer heat and carefree nights slowly fade away and in comes the crisp air and shorter days. Swimsuits are packed away and out come boots and scarves, I wait all year for it. California however taunts us with warm nights and indian summers into late September and early October, but nonetheless you can sense the impending season.

Goodbye summer, hello Fall.

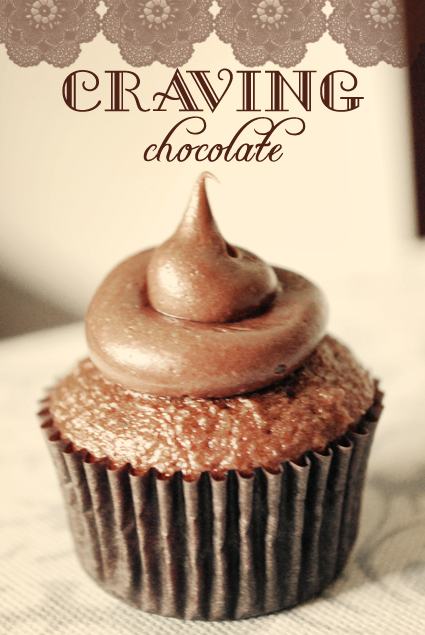
{Craving Chocolate}

Mmmmm....chocolate! It's football season and that means that most days of the week my t.v. has been taken over by my husband and his obsession with football. This season I'm trying to be a good sport and make the most of it, which to me means I have another excuse to bake goodies and cook up treats to eat while watching the game.

I suggested we invite some friends over for food and merriment during the first real weekend of the football season. Any reason to have a small party right? Not surprisingly my husband was all for it.

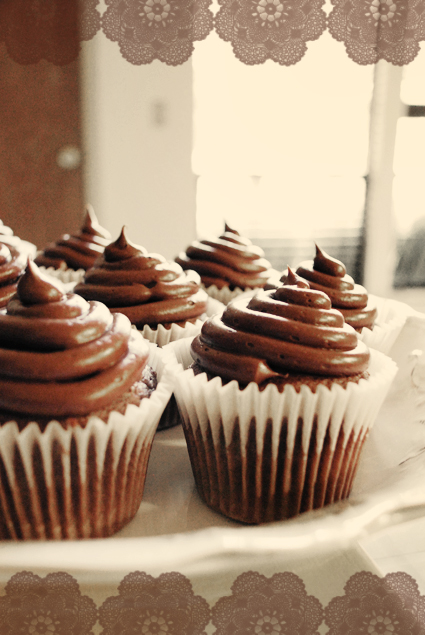
These chocolate cupcakes are nothing special really, just a basic recipe, but I did try out my new mini cupcake pan, and the mini espresso brown paper liners I bought a while back at this fabulous online bake shop. They are just adorable! And not to mention the perfect bite size. Maybe even too perfect. You could eat a dozen of them no problem.

I also made their larger counter part in oversized white paper baking cups. I actually prefer the oversized ones to regular sized baking cups, I like the excess at the top, it's pretty and is perfect for catching the frosting if it should go dripping down the sides.

I haven't been posting as regular due to school starting and my new job. I've been a busy girl! But I have a lot of projects to share with you all, most of which are related to the baby shower I am planning for my best friend. I don't want to spoil the surprise for the mom to be, so i'll be waiting until after the shower in a few weeks to post all those projects and goodies.

August 26, 2009

{Parasol Craft: 1st Edition}


Ok, Ok, I am so excited to share this with all you out there. Blogging is so connected to print magazines. It really is an extension of print journalism. I love finding and reading a well written, well laid out magazine. There really is an art to it. Well, lately I've been searching for good reading materials about blogging and craft, and let me tell you, I haven't come across much.

There is the print magazine Artful Blogging (which is great, and expensive) and a plethora of "how to make your blog better" books at Borders, but nothing craft/art based with a blogging side.

Well let me introduce you to my new favorite read! Yasmine Surovec, who runs a print/design blog called a A Print A Day has been putting out the digital magazine Parasol. Parasol is design + art + creative lifestyle based and is free to download. It's now in its 4th edition, and is filled with a lot of great content, pictures, and amazing layouts. (I suggest you all download the entire range of editions, its a great read.)

Now, Yasmine has introduced a new endeavor called Parasol*Craft. It's an online/PDF magazine dedicated to handmade + inspiration and lots of downloads. It's a spin off of Parasol Magazine in that craft is the primary focus and the objective is to promote and inspire creativity. At only $2.50 this is the BEST purchase i've made in a long time. The magazine is chocked full (over 110 pages!) of amazing pictures, articles with fellow bloggers and crafters, downloads, and projects. You can purchase the magazine to download here.

It was exactly what I've been looking for...for now. I only wish it was in print format. I'd love curl up with it and a cup of coffee. If anyone else knows of great blogging/craft/sewing 'zines, please do let me know!

August 24, 2009

{The Pacific NW}

I'm back, tired, and glad to be sleeping in my own bed! The recent trip to Washington was great. It was filled with lots of music, camping, many miles of driving, lots of old friends, and a few new ones. We managed to sneak away from the festival one afternoon and cross state-lines into Oregon for a quick trip to Portland.

We didn't have much time to explore the city, so we made the cult sugar staple Voodoo Doughnut our destination. I couldn't believe the line was out the door(!) and this was at 4 o'clock in the afternoon! Doughnuts are seriously popular at Voodoo, and seriously wacky. I'll just say that my donut was the size of my head, no exaggeration.

Because of our time constraints I only managed to snap a few pictures along the way. I wish we had more time to really check out what Portland has to offer. I would have loved to do a little shopping. All is good though because I've been promised a return visit. Hopefully soon!

August 18, 2009

{Off & Away}

One of the great perks to being married to a music man is that you get to travel a lot, visit a lot of interesting places, meet a lot of interesting people, and hear a lot of good music. I'll be out of state the next 6 days, at a music festival in Washington. I've been promised an excursion to Portland (the beard capital of the USA) along the way, which I am very excited about. I've never been to Portland, but have heard so many great things about it. I'm hoping to come back with a few jewels to share. I'm so excited!

I've done some serious html/css coding research lately and added some great things to this blog. A new header, which still needs a little tweaking. And you can now contact me (and please do! I'd love to hear from you) visit my Flickr page, my Facebook page (right now it's a link to my personal one, if I ever have time I may start an AG one) and finally subscribe to my RSS feed via the neat little tags on the left of the page!

I've also added an about me link in the new menu bar, and a link to the Etsy shop. I'm still working on getting items up, so not much is going on there yet. I'm hoping that all the new additions will make Abstract Grace a more user/reader friendly blog. We all need easier in our lives, right?

Well, this is my Friday, so i'll see you all next week!


August 14, 2009

{Baking It Pretty}

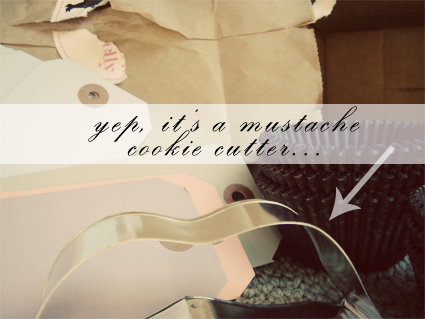
Hands down, one of my favorite leisure activities is baking. It's such a stress reliever for me that I bake every chance I get, at least once a week. I've posted before about a lovely little site that sells adorable baking goods called Bake It Pretty. Last week I ordered some light blue office-esque tags, chocolate brown mini and regular sized cupcake liners, and my new favorite cookie cutter, which I have affectionately named "the 'stache". I am already thinking of a few people who will be receiving cookies made with "the 'stache" very soon, and the husband has already requested I make some for his upcoming birthday.

It's so exciting opening the mailbox to see a package you know is going to be filled with great things. I was very excited today was delivery day. My items were packaged nicely in a brown paper bag with a Bake It Pretty sticker seal. I love details like that.

I suggest you stop by the site and take a look around. It's filled with a million awesome things for the baker who obsesses over making food pretty. Because eating cute food is a millions times more fun, right?

Oh, in other AG news...I've started a Flickr account. (I know, I know, who doesn't have a Flickr account? Apparently no one except me until today.) I'm hoping it makes me more diligent about taking photos and blogging about them. You can see the scant collection so far here.

July 27, 2009

{Renegade SF Spotlight-I Made You A Beard}

Well, I'm back. The birthday extravaganza weekend was great! I have some awesome friends, and am still wishing I was floating on the river, soaking up the sun and eating mexican food....ahhhhhh. Not to mention I got some gifts that are burning holes in my wallet...eh hem...anthro gift card. Anywho...
above image courtesy i made you a beard

I'm fond of beards. My husband has one (in fact i've never seen him without one) and I wouldn't have it any other way, well except that time he decided to grow it out crazy David Bazan like...that was a little much. That's why I was super excited to come across Erin Dollar of I Made You A Beard.
Not only is she from the unofficial beard capital of the USA (Portland!) but she makes the most charming beards and blogs about them and other beardy things. Take a look for yourself, her Etsy store is chocked full of bearded goodness.

These photos are from Erin's booth at Renegade SF. The moustache (not mustache) pins above are my favorite item. (Especially that little bright red one). I mean really, can you get any more creative then making colored beards out of yarn and felt!? The shapes, the styles, the textures...the whole thing makes my un-fuzzy face smile. Do you think the office people will stare if i wear the pink one to work??? Hm........tempting.

P.s. She also has non-beard related items. Art done under her own name, and a separate Etsy where you can buy prints.

P.p.s I think i'll be doing more posts on the beard topic, i've been running into some great things recently...keep an eye out.

July 24, 2009

{Happy Weekend}

Have a great weekend. I know I will, I'll be celebrating my 24th birthday on Saturday! I've been waiting years and years for this specific birthday, just so I can listen to this song. Happy Weekend everyone!

July 23, 2009

{Renegade SF Spotlight-The Black Apple}

Emily Martin and Co., of The Black Apple were probably the biggest name at Renegade this year. After her appearance on Martha Stewart making dolls a while back, Emily has become the go to Etsy Store/Blogger for her paintings and her signature dolls (add jewelry, paper goods, and books to that also). Rumor has it that Emily even had fans at Renegade. Well deserved however, because her work is amazing. (Try getting any of her original items, they sell out FAST!)


Her items are whimsical, soft, and very well crafted. Especially her dolls, which are in real life works of art in themselves. The quality and craftsmanship of them is far superior to my attempt at the pattern.

You can read and view more pictures from The Black Apple at Renegade SF here.

Next we'll visit the amazing mustaches of Erin Dollar and I Made You A Beard!

July 21, 2009

{Etsy. Etsy, Etsy!}

I am soooooo excited about this next post.

I officially have an Etsy store! I'll be selling handmade items for women, children and baby. Over the next few weeks i'll be getting the store up and running, but you can still check it out in the meantime. Hopefully this new endeavor will result in more frequent blogging and an upsurge in my creative juices. Please visit the Abstract Grace Etsy Store (so excited to be typing that!) and in the meantime keep reading the blog and drool over this fine Etsy item from June Designs, I know I have...


July 19, 2009

{Renegade SF}

So, we're back from Renegade San Francisco 2009, and I must say it was a lot of fun! Over 225 different DIY vendors were there, and there was a great public turn out to the event. Getting through to all the booths was definitely doable in one afternoon, but the crowds made squeezing in to see every last item a little troublesome. The event showcased some great DIY-ers, and products ranging from jewelry, clothing, handbags, paper goods, stuffed items, ceramics, posters, art prints, crayons, candles, baby goods, children's items, reconstructed clothing and jewelry, soaps, etc. It was a lot of fun seeing what other people create, and most definitely got my creative juices flowing.

It made me think about the potential that all sewers/crafters have to make a living doing what they love. There was definitely room for more types of goods, and it made me think about getting my Etsy store up and running. I've been putting it off for no good reason, but after seeing the results at Renegade it's now on the top of my to-do list.
I took some great photos of the event and over the next few weeks, i'll be sharing them with you. Showcasing some new vendors and some already popular in the blogosphere. Overall the event was great, even Travis was excited about all the exhibitors and my upcoming Etsy shop. He always encourages me to sell my crafts, and his entrepreneurial mind is always scheming up ideas, I love that about him. Plus it was nice to be out of the 105 degree Sacramento weather and in the breezy 73 degree San Francisco weather for the day. Here's a pic of Travis and I outside the Renegade Festival at Fort Mason. Can you believe Tuesday is out 2 year wedding anniversary! Yay!

July 1, 2009

June 21, 2009

{Little Shoes for Little Feet}

Like I mentioned before, I've been sewing a lot. And it seems that all I'm sewing lately are patterns for baby related items. While I have no kiddos, everyone else seems to be adding new additions to their family, and it's keeping my fingers busy.

These are the most adorable little cloth baby shoes. The pattern is relatively easy, and free to download here (thank you Michael Miller Fabrics and this lovely blog). The great thing about this pattern is that all the pieces are so small it's a great project to do with all those scraps of fabric you can't bear to throw out, but don't know what to do with.

The pattern says it fits babies from 0-6 months. I would suggest that it can be altered as far as materials go. Skip the bonded fleece (I used what I had on hand--standard felt) and interfacing, or substitute with what ever you have and all will turn out fine. In essence this is a basic pattern that can be used to make casual lightweight slippers or bulked up with leather bottoms for a dressier look.

Either way your baby will be adorable in them. These green polka dot and pink striped booties are going to a special little someone due this Fall. Meanwhile, if you're curious about what other people have done with the pattern, check out this Flickr group!

June 17, 2009

{Petite Treats}


Yes, the evil empire that is Starbucks is my arch nemesis. I don't even want to know how much money we spend a month there. I think i'd have a heart attack. Between me and the hubby we have been known to visit TWICE in one day. (Well, a coffee in the morning, then one in the afternoon for a pick me up...) Horrible, I know. Even more costly is the urge to add a pastry or scone to your drink order, and Oh, I often do. Especially those Petite Vanilla Scones. Those are my favvvvv. Well, I searched the web for a copycat version, and got a few different ones.

Going by picture, texture, and ingredients, I modified one recipe a little, and came out with a VERY good replica. These vanilla scones are spot on in flavor, and appearance, however the texture is a tad (I mean very minimally) lighter. The Starbuck's ones are dense while light (does that make sense???), and these ones are on the lighter side, a tad less dense. Perhaps I'll reduce the amount of baking powder next time, that might do it. Overall these are amazing! Make them and you'll be pleasantly surprised, and so will your wallet.

Ingredients
2 cups of all purpose flour
2 teaspoons baking powder
1/2 teaspoon baking soda
1/2 teaspoon salt
1/2 cup sugar
5 tablespoons unsalted butter
1 cup of full fat sour cream
1 large egg yolk
1/2 vanilla bean (pod split, seeds removed)
2 teaspoons vanilla extract

Glaze
1/2 Vanilla Bean (pod split, seeds removed. other half of bean used in dough)
1 1/2 cups confectioners sugar
Heavy cream as needed

Directions

1. Preheat oven to 400 degrees
2. Whisk together dry ingredients
3. Using any method you prefer, cut the cold butter into the dry ingredients until flour resembles coarse meal.
4. In a separate bowl, whisk together the sour cream, egg yolk, vanilla bean insides, and vanilla extract until blended. Add this to the flour-butter mixture and mix on low until dough forms a cohesive ball. Use a spatula to get the dry bits fully incorporated. (It may seem a bit sticky, but this is the texture you want.)
5. Pat dough on a floured surface into a disk about 1-inch in height. Cut into 1.5 inch triangles. Place the pieces on silpat or ungreased baking sheets.
6. Bake for 12 minutes or until lightly golden brown on top.
7. Prepare glaze while scones are baking
8. Place powdered sugar and the other half of the scraped vanilla bean seeds in a medium bowl, and add water/heavy cream one teaspoon at a time, mixing vigorously until smooth and runny.
9. Use a pastry brush to apply a thin layer of glaze over the cooled scones. Brushing rather than drizzling gives a smoother appearance and requires less glaze. Reapply glaze once the first coat had dried to the touch.
10. Serve immediately. Store cooled scones in an airtight container. Or freeze unglazed scones for future use.

June 16, 2009

{Sunny Yellow Birthday Wishes}

I've been sewing lately. With all the babies coming this fall, and summer birthdays I've been busy. This bag is for one of my best friends, (I'll keep it anonymous in case she's reading). The pattern is the Amy Butler Birdie Sling, a simple to make bag that has enough room to keep all your summer items close. Really, this thing could fit a towel, sunscreen, several magazines, and a change of clothes, it's that big. And I love it. The first time I made this bag...well, you can read about that adventure for yourself. Inside the bag are a few goodies, a pair of cloth baby shoes, and a bib. Just for fun. Hm...hope that doesn't give it away.

June 6, 2009

{Homemade & Handwritten}

For a while now I've been on the hunt for new recipe cards. My recipe box is scattered with torn, stained, and faded recipe cards that are close to unreadable. My only problem, is that I am looking for a highly personalized, cute and cheap card to replace them. I found a few that fit one or two of the said requirements, but not all three.These and these (oh and these) are very good options, and I would love to have any of them, but they are lacking in the third requirement, cheap. And don't we all know that that is the most important (at least in my case it is).

The internet does have a plethora of free downloadable cards to choose from, but they lack in personalization and design...so I decided to make my own. A perfect solution to my 3 requirements! I made three different designs choosing only one in the end. Inspiration for the last design came from this stationary I found on Etsy, and it was my design choice for the new cards. I found the vector clip art for free online, and arranged images/changed colors in Photoshop. I also added a monogram to the design and some lines for neater recipe writing. My printer prints on a variety of paper sizes, so I put 3x5 index cards directly into the machine and out came my new cards!

The most tedious part came when I transfered all my recipes to my new cards. We both know that handwritten is so much more charming than typed, it took me a few hours, but the end result was worth it. I now have a completely new set of recipe cards that I love!

May 20, 2009

{Bebes Pt. Deux}


As promised, here are a menagerie of photos that would be great to base a boy baby shower off of. If any of my currently preggo friends end up having a boy this idea gallery will definitely come to life. My ideas here stem from an outdoorsy-woodland theme. A whimsical forest table with touches of faux bois, polka dots, sky blue, yellow tinged green, brown and grey. There is so much that can be done with texture alone in this category! I thought that bringing in yellowed green and vibrant blue would tone down the "nature" factor while keeping the whole thing fresh and young. I definitely want the whole thing to stay away from having a "camping" feel, but rather am going for an "Alice In Wonderland-foresty-chic" kinda thing...that makes sense right???