Showing posts with label tutorials. Show all posts

June 26, 2012

4th of july pinwheel tutorial

Today I'm sharing a quick and easy tutorial for making 4th of July decorations. Pinwheels are fun, simple to make, require basic supplies, and are perfect for last minute procrastinators, ahem...like myself. I made two sizes of pinwheels, a 12 inch and a 6 inch. Both are fun, but the large ones really make an impact. I chose not to put stakes on mine, but if you'd like to line your driveway or use them as festive cake toppers just tape a bbq skewer onto the back. 
Happy decorating! 

May 24, 2012

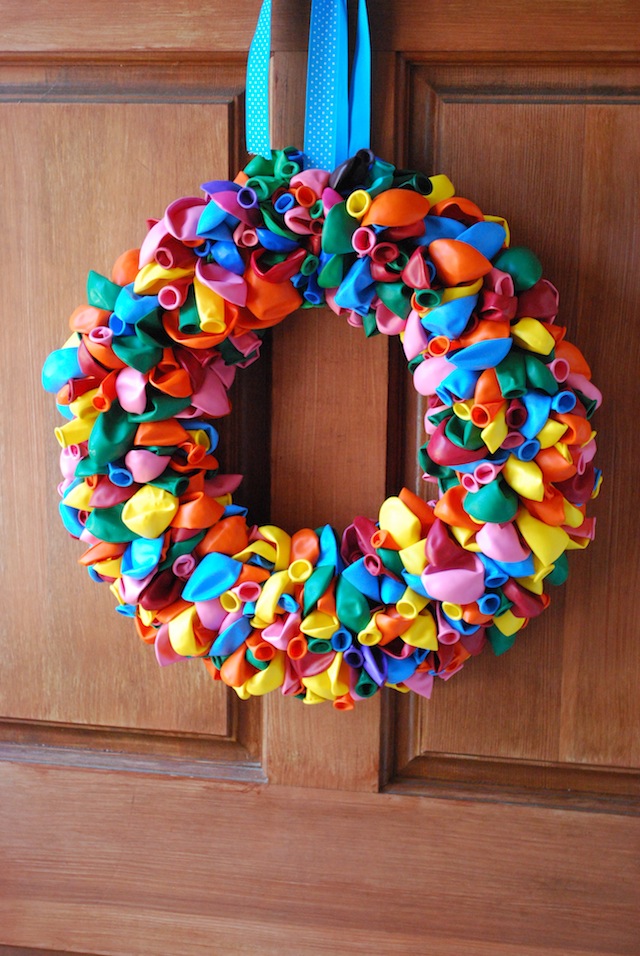
Birthday Balloon Wreath Tutorial


Im still trying to believe my little one is going to be TWO next week. The proof is in the pink chalk that's scribbled on my front door, i'll get to cleaning that off eventually. 

Memorial Day weekend is a special time around our house because Ella was born on Memorial Day 2010. It's great for her because she'll always have a 3 day weekend for her birthday, and great for mommy and daddy because we have an extra day to recuperate after all her birthday festivities. 

This wreath is so colorful and perfect for letting the neighborhood know that someone in your household has a birthday.  I'm looking forward to hanging it up a few times a year to celebrate all our birthdays. It's so cheerful, who wouldn't be happy when they see it. 

Read on for the full tutorial!
Supplies needed:
14" Styrofoam wreath (I got mine at Michaels, it was $6.99, but with a 40% off coupon I paid $4.50)
2 Pkgs 100 ct greening pins (Got these at Walmart in the floral section for $1.00 a package)
3 Pkgs 72 ct Balloons (Also purchased at Walmart for $4.50 a package)
Ribbon (I already had on hand)

TOTAL COST: $20.00


NOTE: Before you get started, you have the option to wrap your styrofoam wreath in ribbon. I decided to do this so that the back of the wreath is covered in something instead of seeing styrofoam, it just gives it a more polished look. It's not necessary though because you wont be seeing the back side of the wreath when the project is finished. Just personal preference.
Step 1: 
Take 2 balloons and stack them on top of eachother. Place the middle of the stacked balloons between a greening pin.
 Make sure the balloons are centered, if they're not you can adjust them once you push them into the stryofoam wreath, but better to make sure they are before you push them in. Assuring they are centered helps keep your wreath uniform and full. 
 Step 2: 
Push the greening pin with the balloons into the wreath.
 See how the balloons are centered? :)
Step 3: 
Keep on goin'! Continue to place balloons into the wreath until you've covered the whole front side of the wreath. Depending on how big/wide your wreath is you'll need to put more balloons towards the middle and the outer edges. You want your balloons to be close together so that you cannot see the wreath underneath, but not so tight otherwise you'll run out of balloons the last few inches, and running out to buy more balloons when you're that close to finishing doesn't sound like fun. 
 Yep, there's A LOT of balloons to be attached, so keep on going!

Step 4: (not pictured)
Before you completely cover the wreath cut a length of ribbon to hang your wreath and attach it with a few greening pins, then continue to cover right over that ribbon with the rest of your balloons. 

You're finished! Now hang that baby up and get ready to celebrate!

February 8, 2012

mason jar + felt = love

I've been addicted to Pinterest (who isn't, right?) for a long while now. It's just the most amazing place to find new recipes, projects, and inspiration. I came across these Valentines day jars and happened to have everything to make them on hand (love when that happens).
First off I dyed my doilies in coffee. Don't worry, it was cold, old, stale coffee from the morning (wouldn't want to go wasting good coffee now would we?). I basically just let the doilies soak in the coffee for a few min, then placed them on a paper towel to dry. The rule of thumb is that the longer you leave them in, the darker they get.
 Then you just cut some hearts out of felt, and wrap the doilies and felt hearts around the jar with your bakers twine. I used a variety of jars I had on hand, so anything goes. Then you can fill your jars with candy or even use them as small flower vases. Easy peasy.
 If you want to check out the original blog post on how to make these click on over to this blog.

February 2, 2012

feelin' the love

It's February 2nd! That means only 12 more days until Valentines day. We were at Lowe's the other night and I stocked up on paint swatches in shades of red and pink knowing that I'd need to decorate something for the holiday this month. I used the same method as my Halloween paint swatch garland (you can find my tutorial here). The only difference this time is that I glued my paint swatches together first (right sides out) and instead of using a 2" hole punch, I freehand cut hearts. The hearts are by no means exactly the same but they look cute hanging from the mantle nonetheless. It was so fast and easy that it got me wanting to start on another Valentines day project. I'll share that one next week!

December 12, 2011

holiday chevron stamp tag tutorial

The holidays are here! I've slowly been crossing things off my to-do list for the season and there are lots more things to do before Christmas arrives. I've been wanting to try my hand at making my own stamps using a ridiculously easy method and decided to give it a go and do some holiday gift tags. They turned out really cute! Here's how I did it:
Materials:
Puff Paint (any color)
Cardboard or other flat hard surface
Shipping tags
Ink pad
Step 1:
Draw your design on your card board with the puff paint. You can draw out your design first with pen if you'd like. I just freehanded a zig zag design.
*Remember if you do any lettering in needs to be backwards so when you stamp it it shows up reading correctly.
Step 2:
Once your design is dry blot your ink pad on the puff paint design which is now your "stamp."
Step 3:
Press on your shipping tag just like you would a stamp. That's it! Your done!
I had a "happy holidays" stamp (that I didn't make) which I added to my tags. And of course don't forget to add a ribbon or string for attaching to your gifts.
Happy Holidays!

November 10, 2011

feathered turkey shirt tutorial

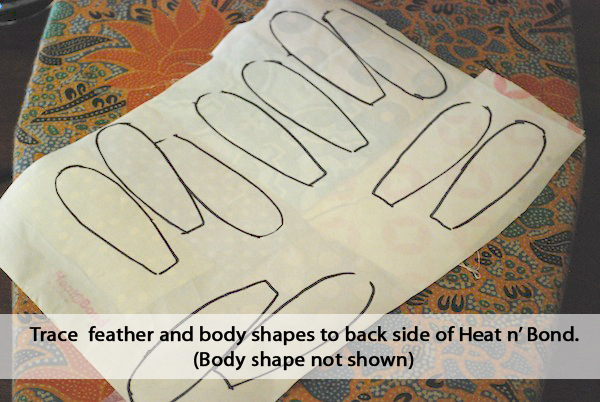
I know I've been MIA the last week or so and that this post it TOTALLY last minute, but here is a quick tutorial for the turkey applique shirt I make Ella to wear on Thanksgiving. Don't worry, it's super easy and a super quick project. Have a great Tuesday!

October 24, 2011

ruffle pumpkin shirt tutorial

Remember the shirt Ella wore to our outing at Apple Hill? Here's the tutorial so you can all make one for your little pumpkins. It's a pretty self explanatory tutorial so i'll let the pictures speak for themselves. If you have any questions leave them in the comments and  i'll try and answer them.
All Done!