Showing posts with label Ella June. Show all posts

June 29, 2012

yo gabba gabba thank you

Ella's Yo Gabba Gabba 2nd birthday party was a huge success! I'll share pics of the party soon, but until then I wanted to share the "thank you" card that I designed for all her guests. 

I really enjoy designing invites and thank you's. Here is a thank you I designed recently for a friends little boy. Can you guess the theme of his 2nd birthday party...yep, Sesame Street!

Hope you're all having a great week!

xo,
Laura

May 31, 2012

happy birthday Ella June, you're TWO!

Happy Birthday my sweet baby girl. I can't believe you're TWO years old today. You're truly the most beautiful child and I'm blessed beyond measure by your loving spirited personality. You have the best parts of your daddy and I, and we love you SO MUCH!
Happy Birthday Junebug!
We're having a party this weekend, and its Yo Gabba Gabba themed! Yay! I'll be sure to post pictures next week after the party, but until then...here's the party invite and water bottle labels I designed for the party. 

May 24, 2012

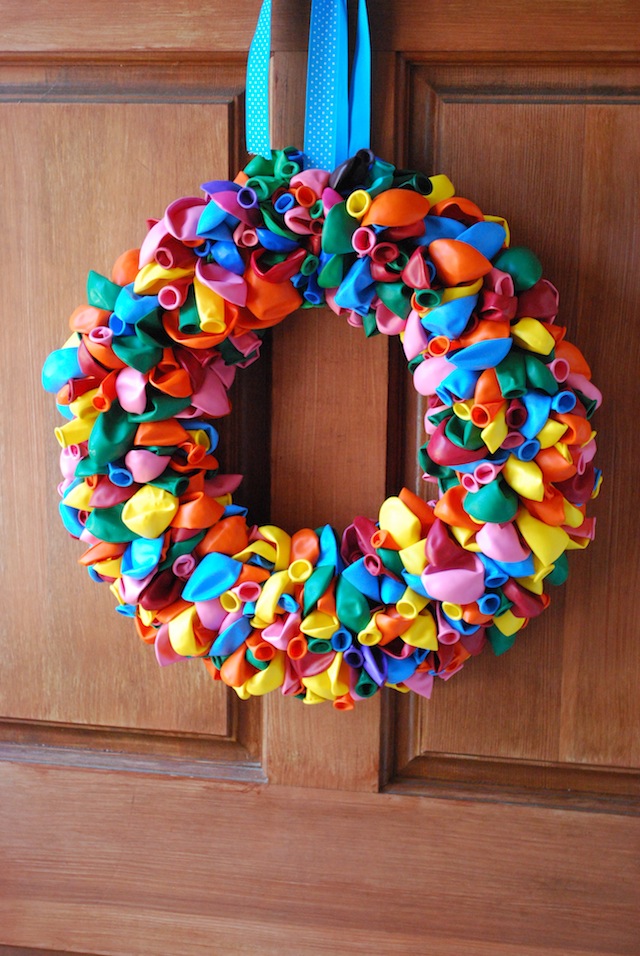
Birthday Balloon Wreath Tutorial


Im still trying to believe my little one is going to be TWO next week. The proof is in the pink chalk that's scribbled on my front door, i'll get to cleaning that off eventually. 

Memorial Day weekend is a special time around our house because Ella was born on Memorial Day 2010. It's great for her because she'll always have a 3 day weekend for her birthday, and great for mommy and daddy because we have an extra day to recuperate after all her birthday festivities. 

This wreath is so colorful and perfect for letting the neighborhood know that someone in your household has a birthday.  I'm looking forward to hanging it up a few times a year to celebrate all our birthdays. It's so cheerful, who wouldn't be happy when they see it. 

Read on for the full tutorial!
Supplies needed:
14" Styrofoam wreath (I got mine at Michaels, it was $6.99, but with a 40% off coupon I paid $4.50)
2 Pkgs 100 ct greening pins (Got these at Walmart in the floral section for $1.00 a package)
3 Pkgs 72 ct Balloons (Also purchased at Walmart for $4.50 a package)
Ribbon (I already had on hand)

TOTAL COST: $20.00


NOTE: Before you get started, you have the option to wrap your styrofoam wreath in ribbon. I decided to do this so that the back of the wreath is covered in something instead of seeing styrofoam, it just gives it a more polished look. It's not necessary though because you wont be seeing the back side of the wreath when the project is finished. Just personal preference.
Step 1: 
Take 2 balloons and stack them on top of eachother. Place the middle of the stacked balloons between a greening pin.
 Make sure the balloons are centered, if they're not you can adjust them once you push them into the stryofoam wreath, but better to make sure they are before you push them in. Assuring they are centered helps keep your wreath uniform and full. 
 Step 2: 
Push the greening pin with the balloons into the wreath.
 See how the balloons are centered? :)
Step 3: 
Keep on goin'! Continue to place balloons into the wreath until you've covered the whole front side of the wreath. Depending on how big/wide your wreath is you'll need to put more balloons towards the middle and the outer edges. You want your balloons to be close together so that you cannot see the wreath underneath, but not so tight otherwise you'll run out of balloons the last few inches, and running out to buy more balloons when you're that close to finishing doesn't sound like fun. 
 Yep, there's A LOT of balloons to be attached, so keep on going!

Step 4: (not pictured)
Before you completely cover the wreath cut a length of ribbon to hang your wreath and attach it with a few greening pins, then continue to cover right over that ribbon with the rest of your balloons. 

You're finished! Now hang that baby up and get ready to celebrate!

April 9, 2012

the little one

Gosh, she's just the cutest thing, and picked the white beanie out herself from my closet. This kid has good taste! I adore her, runny nose and all. 
Happy Monday!

November 30, 2011

where does the time go?

Wow. Where does the time go? Ella June is 18 months old today and I can't believe it'll only be 6 more months until her 2nd birthday party. She is a doll. The most perfect, beautiful, snuggly child. I love her to pieces. 
 Of course this is how I find her most days. Pulling everything out of baskets and every toy she owns out of bins. She's into EVERYTHING these days. 
She loves Minnie Mouse, watching Yo Gabba Gabba, Barney, Kipper and The Backyardagains, going to the park, riding the swing, and going down the slide, and always asks for a bow after we get dressed in the mornings. She also had her first trip to Chuck-E-Cheese and loved every second of it
She also loves to say "no" to me then close her eyes real tight when I scold her as if she can't see or hear me. Then when I try and keep it serious she cracks a smile. Lovely, huh? I think we have a jokester on our hands. 

Happy 18 Months Junebug!
I love you!

October 20, 2011

apple hill + halloween outfit

As soon as October hits and there is the slightest feeling of Fall in the air everyone in Northern California gears up to head out to Apple Hill. Never mind that it's still 85 degrees outside, if the apple pie, apple butter, apple donuts, apple-you-name-it is being made then then we consider Fall among us. 

Apple Hill is a tradition around these parts. Basically, its just a group of 20+ apple orchards that open up for the Fall for apple picking, craft vendors, yummy apple baked goods, pumpkin patches and an all around good time. Each farm is different and offers different things, some more kid/family friendly with attractions and tractor rides and some are just for apple picking. 


Yesterday I ignored that it was 77 degrees out and dressed Ella in her Halloween outfit for our trip up to Apple Hill, because c'mon now I spent all that time making it and it's almost Halloween and she hasn't worn the getup once. Sorry Ella if you were sweating through that black shirt. All in the name of fashion, right?


I'm going to share the ruffle pumpkin shirt tutorial next Monday, but it's such a quick project you'll have no time getting it done before the 31st. Plus, it's a pretty basic Fall design so you should be able to carry on the wearing of it until Thanksgiving rolls around.

The ruffle pants are my favorite part of the outfit. Those I made with some fabric I picked up in the remnants section at the fabric store (yay for cheap!). Travis calls them her halloween bell bottoms, I call them just plain adorable. 


 (In case you were wondering about her bow, it was leftover from last years halloween bows I had in the shop). 

October 4, 2011

sewing for fall: easy leggings


Between the millions of other sewing projects I have going on right now, I've managed to add a couple more pieces to Ella's Fall wardrobe. The most recent addition are these stretchy leggings. I bought a double needle, and have been excited to try using it, so when I came across a $.99 striped knit shirt at the thrift store I knew it would be perfect for fashioning into some leggings for Little Lady.

They really are the easiest things ever, and sewing with the double needle was a breeze. I just traced a pair of leggings that fit Ella on folded fabric, then used my double needle to sew up the sides and the crotch, folded the waist down and added elastic, and hemmed the legs (two pieces! easy peasy!). 

If you'd like to read a great intro into sewing with knits/stretchy fabrics and using a double needle i'd suggest reading this. And if you'd like a tutorial using the same method I did to make them, this is a great one (Lots of pictures and helpful instructions).

I definitely will be using my double needle more often, and making a few more pairs of these pants for her. You can use old t-shirts, yoga pants, anything that has stretch to it, so it's a great idea for refashioning items you're looking to get rid of.

Keep an eye out, because I've also used the same method with an added twist to make something else for the Fall season...i'll share that soon!


August 15, 2011

modern embroidery

Let me start by saying I'm no embroiderer. In fact, I haven't really a clue as to any specific stitches or knots. I do however LOVE the look of modern embroidery. For years I've been holding on to a few hoops that I picked up a the thrift store, but my lack of knowledge on the art has kept me from doing anything with them. A few weeks ago I bought an assorted box of embroidery thread for a felt food project I'm working on (more about that later). I decided to go for it, and try my hand at making something with the hoops.

Originally I wanted to embroider Ella's name but because I'm no pro I just decided to stamp her name with black ink on the linen before putting it in the hoop. I actually like the look. It gives nice contrast and adds a different texture to the project. I think it also help keeps it modern and not so "grandma-ish". Apparently I'm no stamping pro either, my letters are quite off. And I will be honest, I had to stamp her name about 6 times before I got a piece I liked.

You can see I'm really not very good, which is evident in the loopy tail of the kite. It turned out more wonky than loopy. Ella has brown and pink in her room so I cut a little wool felt in those colors to make a kite and tail.

Overall it was a pretty easy piece to do, but I think i'll have to keep practicing this craft. It's fun!

Here is some inspiration to get you going. There really are some amazing things you can do with embroidery!
source
source
source

August 3, 2011

{Sewing For Fall - Cap Sleeve Tunic + Headband}

We've been lucky this year in Northern California to have a mild summer. Temps here can reach into the 100's for weeks at a time. Instead of blistering heat we've been treated to temps in the 80's and low 90's most of the summer. I'm hoping this mild weather transitions into Fall earlier than normal this year. In preparation for the next season I've been sewing up a few things for Ella. I've decided I'd like to make a majority of her pieces this Fall and buy her just basics/staples. Below is the first completed item in the Fall wardrobe, a cap sleeve tunic and headband. 
I was brave and didn't use a pattern for the top. In my braveness I had to cut and resew the sleeves twice, frustrating yes, but I guess thats what you get for "winging" it. It's your basic peasant top except that I cut the sleeves a tad shorter to make them capped, and I omitted the elastic from them. This top is more like a tunic as is hits Ella below the hip. It'll be perfect with tights and leggings or over jeans. 
If you want to make one and don't want to wing it, this pattern and this pattern are similar.  The headband is just a mismatch of felt flowers glued to an elastic headband (you could also use 1/4" elastic. 
I think the whole thing turned out so cute! I've since refined my non pattern using skills and whipped up a few other pieces for fall. I'll share those soon!

July 14, 2011

{Ella's New Photo Yearly Tradition}

Below is a a super sweet idea I got from Pinterest (of course, right?!).  I just took one of the pictures from her one year photo shoot and using Photoshop I added a short description of Ella's likes/dislikes at age 1. Click on the picture to get it full sized for a better look at the text. What a great way to remember all the little things about each age, and a fun way to look back and see how much our little ones change.

July 5, 2011

{Ella's 1 Year Portraits}

This post is going to be picture heavy, but the cuteness overload will be worth it. :) I recently took Ella June's 1 year portraits. I wanted to go for classic, simple, and outdoors. At my baby shower I received a beautiful halter tutu dress made by Christa from Mustard Seed Fabric & Furniture which I knew that I'd be photographing Ella in it for her 1 year pics. 

While I did minor in Fine Art Photography in college, i'm no professional photographer. It's always just been a fun hobby for me. In case anyone is curious, I used a Nikon D60 camera for these photos, and they were post processed in Photoshop using Florabella actions

Daddy and Ella. 


Isn't she a beauty? Gosh, every day I thank God for her. She really is the most precious child. 

Oh, and here's one that dad took during out shoot. 
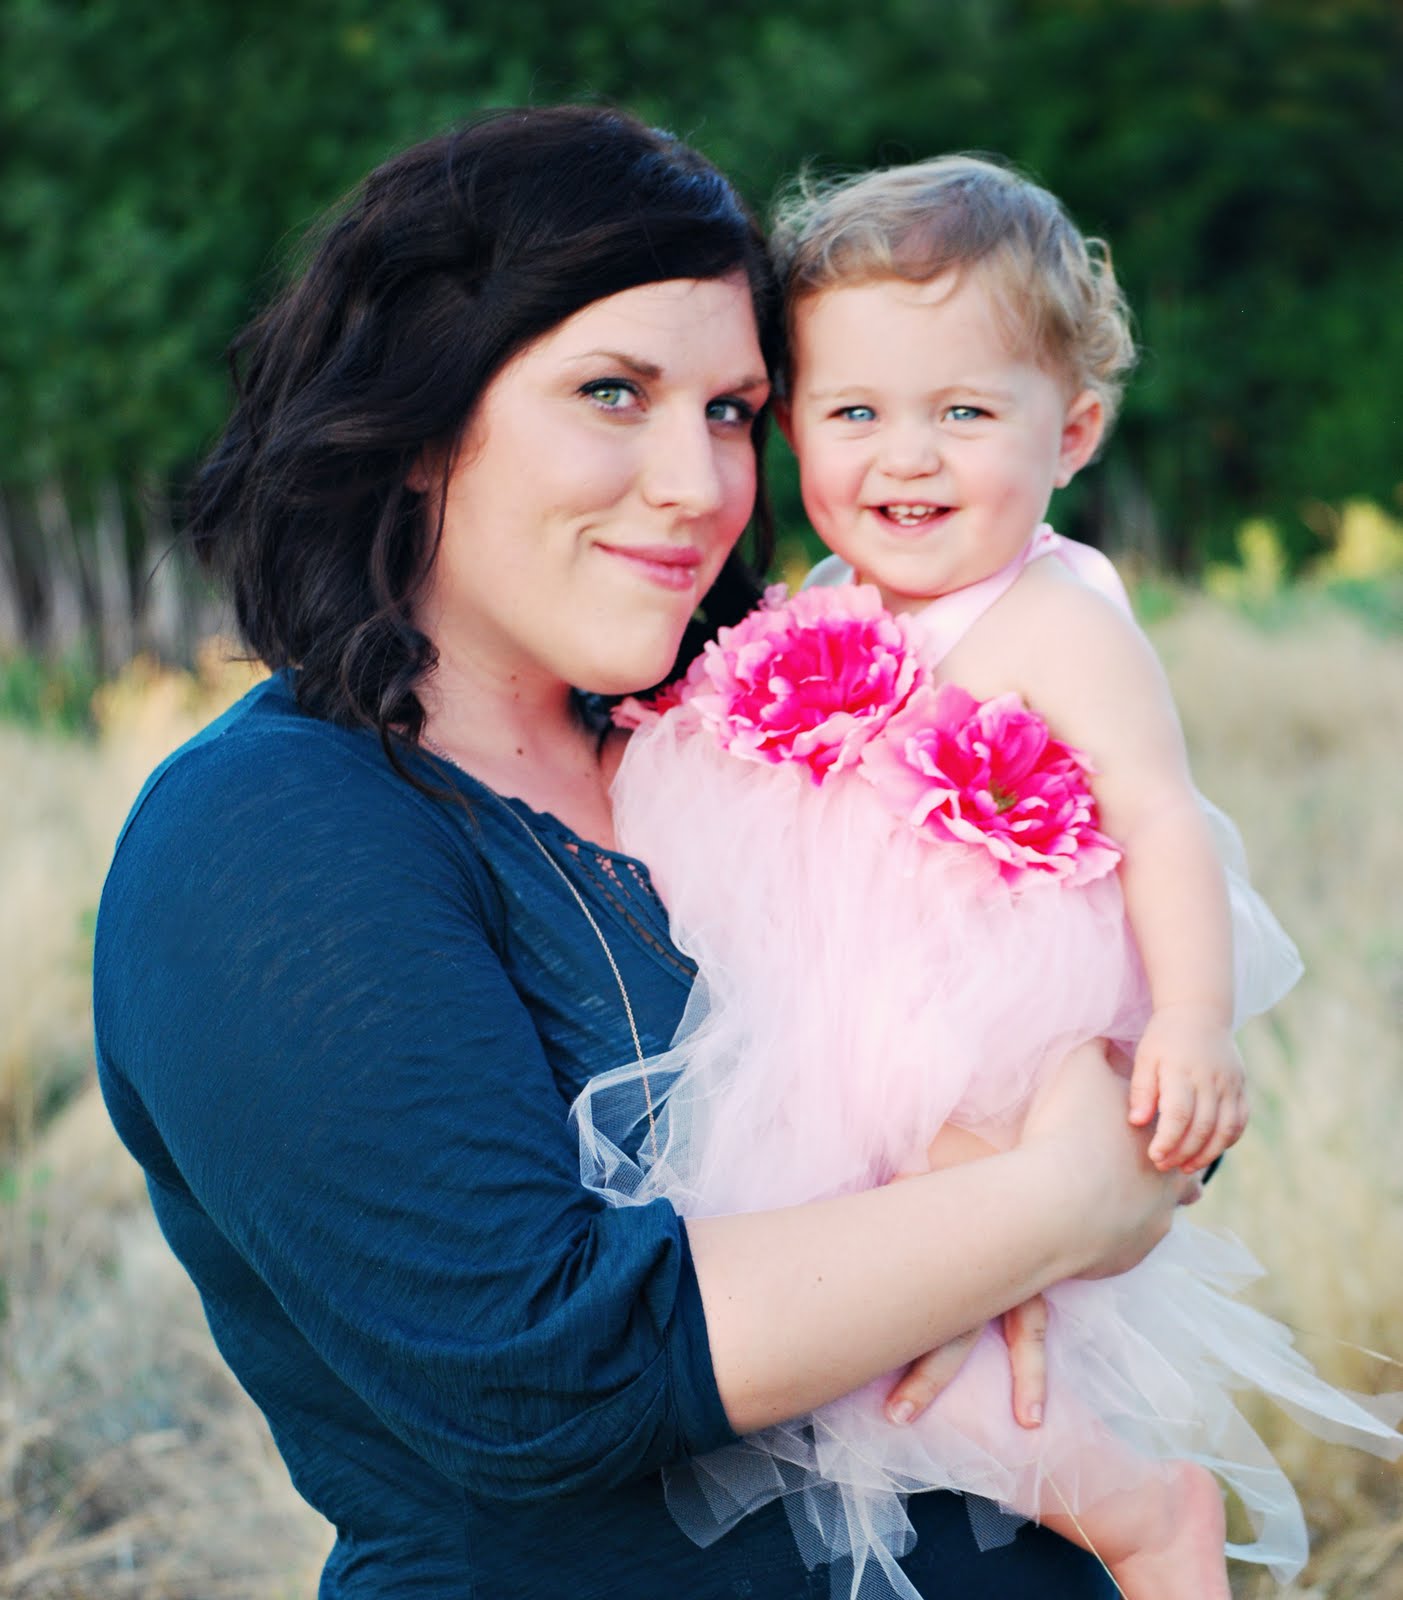
Mama and Ella June.

May 31, 2011

{Happy 1st Birthday Ella June!}

Mommy & Daddy love you to the moon and back. You make every day worth living. Happy 1st Birthday!!!
<3

March 21, 2011

{fun with silhouettes}

There is something so classic about a silhouette, and with today's design software, it's easy to twist a modern version of them. There are a TON of tutorials out there about how to make one using your own photo, but I especially like the one from Jones Design Company (you can find it HERE). 

I made one up for Ella June, and have it framed and in her nursery. It's the perfect personal touch to her already adorable room (photos to come). I added a small flower from my digital scrapbooking stash, and put her name below the whole thing. It really is darling, and EASY to do! One tip that really helps is to make sure that picture has a dark background behind the subject, other than that...it's easy peasy!

September 18, 2010

{pretty little thing}

Remember that lovely little stash of goodies I scooped up at the thrift store the other day? Well I put them to good use and here is the result: A lovely little pink onesie with a vintage fabric appliqued bib and vintage lace trim. Isn't it the prettiest little thing? I'm having a fun time using all of my finds and have a few other designs in the works. I'll share them with you all soon. Now I'm just debating whether to let the Little Lady keep it or put it in the shop. What do you think?
Hope everyone is having a good weekend!