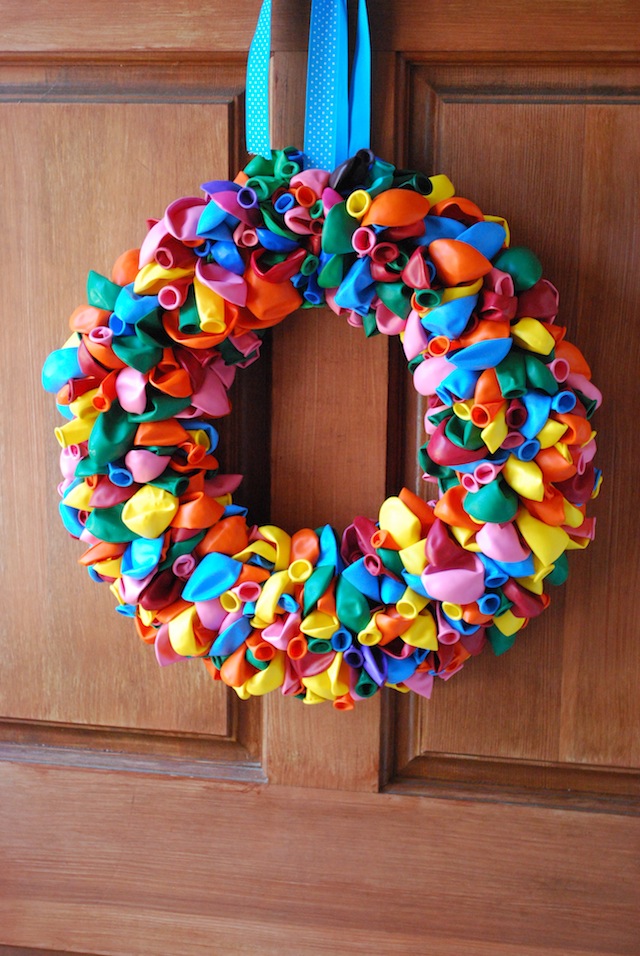
Im still trying to believe my little one is going to be TWO next week. The proof is in the pink chalk that's scribbled on my front door, i'll get to cleaning that off eventually.
Memorial Day weekend is a special time around our house because Ella was born on Memorial Day 2010. It's great for her because she'll always have a 3 day weekend for her birthday, and great for mommy and daddy because we have an extra day to recuperate after all her birthday festivities.

Read on for the full tutorial!

14" Styrofoam wreath (I got mine at Michaels, it was $6.99, but with a 40% off coupon I paid $4.50)
2 Pkgs 100 ct greening pins (Got these at Walmart in the floral section for $1.00 a package)
3 Pkgs 72 ct Balloons (Also purchased at Walmart for $4.50 a package)
Ribbon (I already had on hand)
TOTAL COST: $20.00
NOTE: Before you get started, you have the option to wrap your styrofoam wreath in ribbon. I decided to do this so that the back of the wreath is covered in something instead of seeing styrofoam, it just gives it a more polished look. It's not necessary though because you wont be seeing the back side of the wreath when the project is finished. Just personal preference.

Step 1:
Take 2 balloons and stack them on top of eachother. Place the middle of the stacked balloons between a greening pin.

Make sure the balloons are centered, if they're not you can adjust them once you push them into the stryofoam wreath, but better to make sure they are before you push them in. Assuring they are centered helps keep your wreath uniform and full.

Step 2:
Push the greening pin with the balloons into the wreath.

See how the balloons are centered? :)


Step 3:
Keep on goin'! Continue to place balloons into the wreath until you've covered the whole front side of the wreath. Depending on how big/wide your wreath is you'll need to put more balloons towards the middle and the outer edges. You want your balloons to be close together so that you cannot see the wreath underneath, but not so tight otherwise you'll run out of balloons the last few inches, and running out to buy more balloons when you're that close to finishing doesn't sound like fun.

Yep, there's A LOT of balloons to be attached, so keep on going!
Step 4: (not pictured)
Before you completely cover the wreath cut a length of ribbon to hang your wreath and attach it with a few greening pins, then continue to cover right over that ribbon with the rest of your balloons.
You're finished! Now hang that baby up and get ready to celebrate!