Showing posts with label Decoration. Show all posts

June 26, 2012

4th of july pinwheel tutorial

Today I'm sharing a quick and easy tutorial for making 4th of July decorations. Pinwheels are fun, simple to make, require basic supplies, and are perfect for last minute procrastinators, ahem...like myself. I made two sizes of pinwheels, a 12 inch and a 6 inch. Both are fun, but the large ones really make an impact. I chose not to put stakes on mine, but if you'd like to line your driveway or use them as festive cake toppers just tape a bbq skewer onto the back. 
Happy decorating! 

May 31, 2012

happy birthday Ella June, you're TWO!

Happy Birthday my sweet baby girl. I can't believe you're TWO years old today. You're truly the most beautiful child and I'm blessed beyond measure by your loving spirited personality. You have the best parts of your daddy and I, and we love you SO MUCH!
Happy Birthday Junebug!
We're having a party this weekend, and its Yo Gabba Gabba themed! Yay! I'll be sure to post pictures next week after the party, but until then...here's the party invite and water bottle labels I designed for the party. 

May 24, 2012

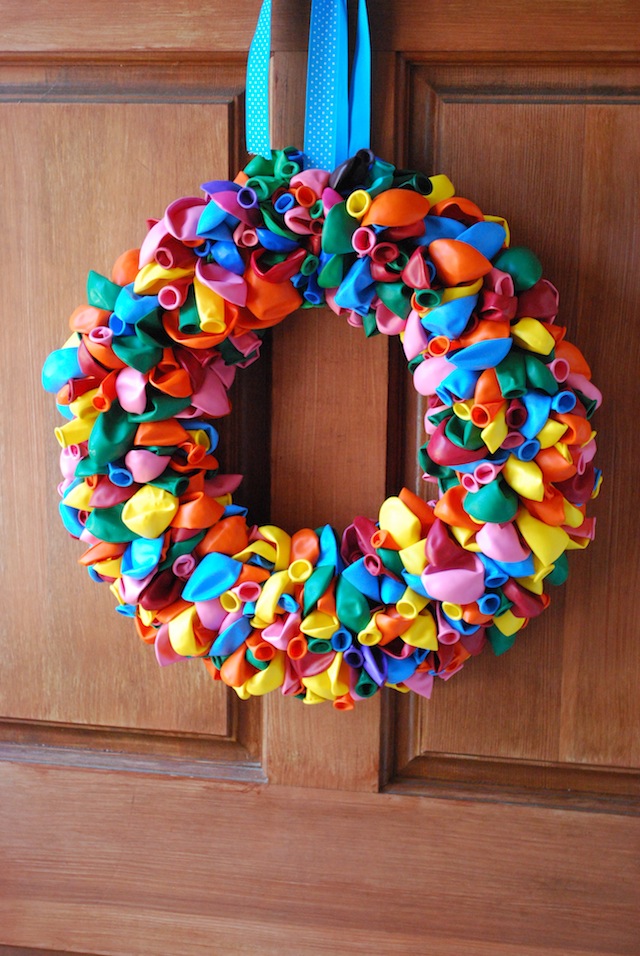
Birthday Balloon Wreath Tutorial


Im still trying to believe my little one is going to be TWO next week. The proof is in the pink chalk that's scribbled on my front door, i'll get to cleaning that off eventually. 

Memorial Day weekend is a special time around our house because Ella was born on Memorial Day 2010. It's great for her because she'll always have a 3 day weekend for her birthday, and great for mommy and daddy because we have an extra day to recuperate after all her birthday festivities. 

This wreath is so colorful and perfect for letting the neighborhood know that someone in your household has a birthday.  I'm looking forward to hanging it up a few times a year to celebrate all our birthdays. It's so cheerful, who wouldn't be happy when they see it. 

Read on for the full tutorial!
Supplies needed:
14" Styrofoam wreath (I got mine at Michaels, it was $6.99, but with a 40% off coupon I paid $4.50)
2 Pkgs 100 ct greening pins (Got these at Walmart in the floral section for $1.00 a package)
3 Pkgs 72 ct Balloons (Also purchased at Walmart for $4.50 a package)
Ribbon (I already had on hand)

TOTAL COST: $20.00


NOTE: Before you get started, you have the option to wrap your styrofoam wreath in ribbon. I decided to do this so that the back of the wreath is covered in something instead of seeing styrofoam, it just gives it a more polished look. It's not necessary though because you wont be seeing the back side of the wreath when the project is finished. Just personal preference.
Step 1: 
Take 2 balloons and stack them on top of eachother. Place the middle of the stacked balloons between a greening pin.
 Make sure the balloons are centered, if they're not you can adjust them once you push them into the stryofoam wreath, but better to make sure they are before you push them in. Assuring they are centered helps keep your wreath uniform and full. 
 Step 2: 
Push the greening pin with the balloons into the wreath.
 See how the balloons are centered? :)
Step 3: 
Keep on goin'! Continue to place balloons into the wreath until you've covered the whole front side of the wreath. Depending on how big/wide your wreath is you'll need to put more balloons towards the middle and the outer edges. You want your balloons to be close together so that you cannot see the wreath underneath, but not so tight otherwise you'll run out of balloons the last few inches, and running out to buy more balloons when you're that close to finishing doesn't sound like fun. 
 Yep, there's A LOT of balloons to be attached, so keep on going!

Step 4: (not pictured)
Before you completely cover the wreath cut a length of ribbon to hang your wreath and attach it with a few greening pins, then continue to cover right over that ribbon with the rest of your balloons. 

You're finished! Now hang that baby up and get ready to celebrate!

April 11, 2012

yellow and grey baby shower

I had the lovely pleasure last month of hosting a baby shower for my best friend. I really love party planning and putting a handmade touch on party decor. Here are a few Instagram photos (follow me! my handle is abstractgrace) of the party decor.
I was also happy to find that Kim from The Tomkat Studio, has teamed up with Pottery Barn Kids sharing great party ideas. There are some great video tutorials and free printables for all types of party decor. I took advantage of her beautiful designs and used the Sunshine Baby Shower suite for printable decor and invitations.

I wanted to go with a yellow and grey color scheme from the beginning. I thought that it was a perfect blend of gender neutral (she was having a boy). I didn't want to go to "boy-ish" with the shower. I guess I just like thing uber-girly!

The brunch menu included crepes with nutella, peanut butter, and preserves. We also had  fruit salad, quiche, goat cheese and crackers, and lemon bars (Ina Garten's amazing recipe). Yellow daises in mason jars tied with twine adorned the buffet and tables, and several walls were covered in vertical hanging crepe paper streamers and yellow and grey tissue paper poms.


My favorite part of the shower was the polaroid guest book. We set up a table with several chalkboard props and took pics of guests when they arrived. Then they were able to write a message below their photo to the mom-to-be and baby. Afterwards all the pictures went into a memory book of the shower as a keepsake for mom. 

It was such a lovely day and I got a lot of compliments from guests on how everything turned out. Now onto planning Ella's 2nd birthday!

June 30, 2011

{4th of July Wreath}

The Fourth of July is one of my FAVORITE holidays. I love the hot summer nights, the fireworks, grill outs, and everyones generally happy, laid back moods. Since we've moved back into an apartment I've been struggling to find creative ways to put my own stamp on the place.  Painting is out of the question, and I'm limited on space, so accessories are my go to decor. You may remember the crepe paper wreath I made, it hung on our front door until recently when it was replaced with this beauty...


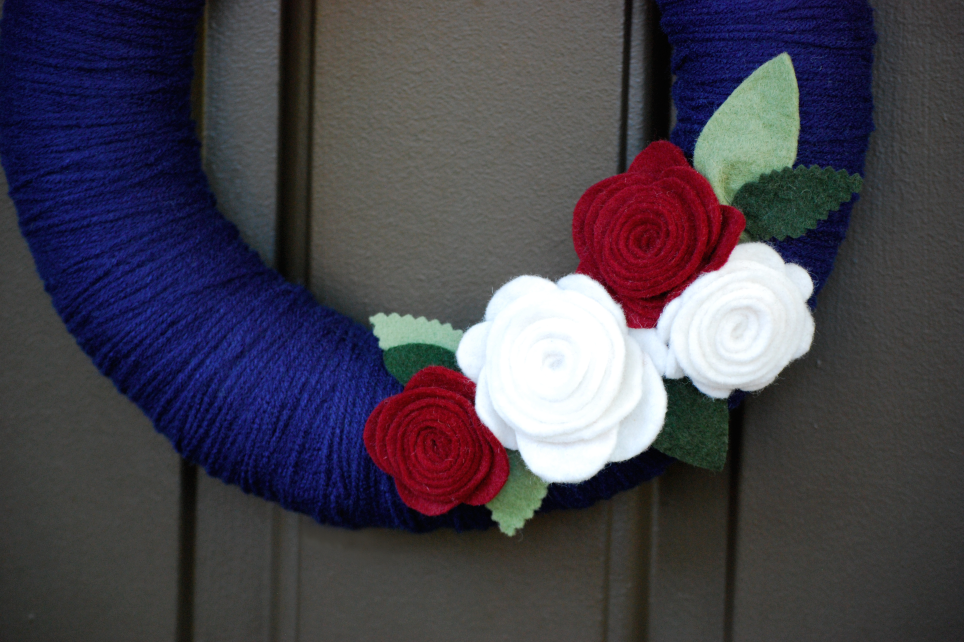
I wanted something that was 4th of July-ish, without being overly 4th of July-ish (if that makes sense). I envisioned using red, white, and blue, but in more muted tones, and not in the traditional stars and stripes fashion. 

Here's how I made it:
I bought a wreath form from Michael's, and wrapped it in navy yarn. I'm not gonna lie, wrapping it completely so that none of the styrofoam shows is kind of a monotonous process. Every few inches I used a hot glue gun to tack the yarn down. After everything was sufficiently covered then I made a few flowers out of red and white felt and hot glued them to the wreath. I just eyeballed their placement, and glued them where I thought they looked best. I also cut a few green leaves out of felt and glued them under the flowers. I used regular scissors and pinking shears on the leaves to add a bit of dimension to the whole thing. That's it! Easy, easy, easy!


The pictures don't do it justice, it's really a pretty wreath, and looks great on our door, and adds just the right amount of festiveness. I'll be leaving it up the whole month of July, and am already brainstorming the next one i'll make for late summer/early fall. 


April 21, 2011

{crepe paper wreath}

I'm a thrift store junkie, but a very particular one. I hate buying low quality things just because they're cheap. If I could have it my way (and afford it) i'd spend the money on high quality items once and cherish them for years. I'm the same way with clothing. For that reason, I frequent the thrift store often, if you go often then you can get the good expensive stuff before someone else snatches it up.

Anyways, during one recent trip to the thrift store I came across a TON of crepe paper, and for cheap. I know it's not a particularly expensive item but at a quarter a package I couldn't pass up grabbing a few to keep in the craft stash. 

I started browsing for crepe paper projects and look at all the fun things you can do with crepe paper!

Adorne packages
{tutorial here}

Adorne notecards (love this)
{tutorial here}

Ruffle & Ribbon (love this too!)
{tutorial here}

Crepe Paper Medallions (possibly my fav)
{tutorial here}

Rose Topiary/Ball
{photo credit}

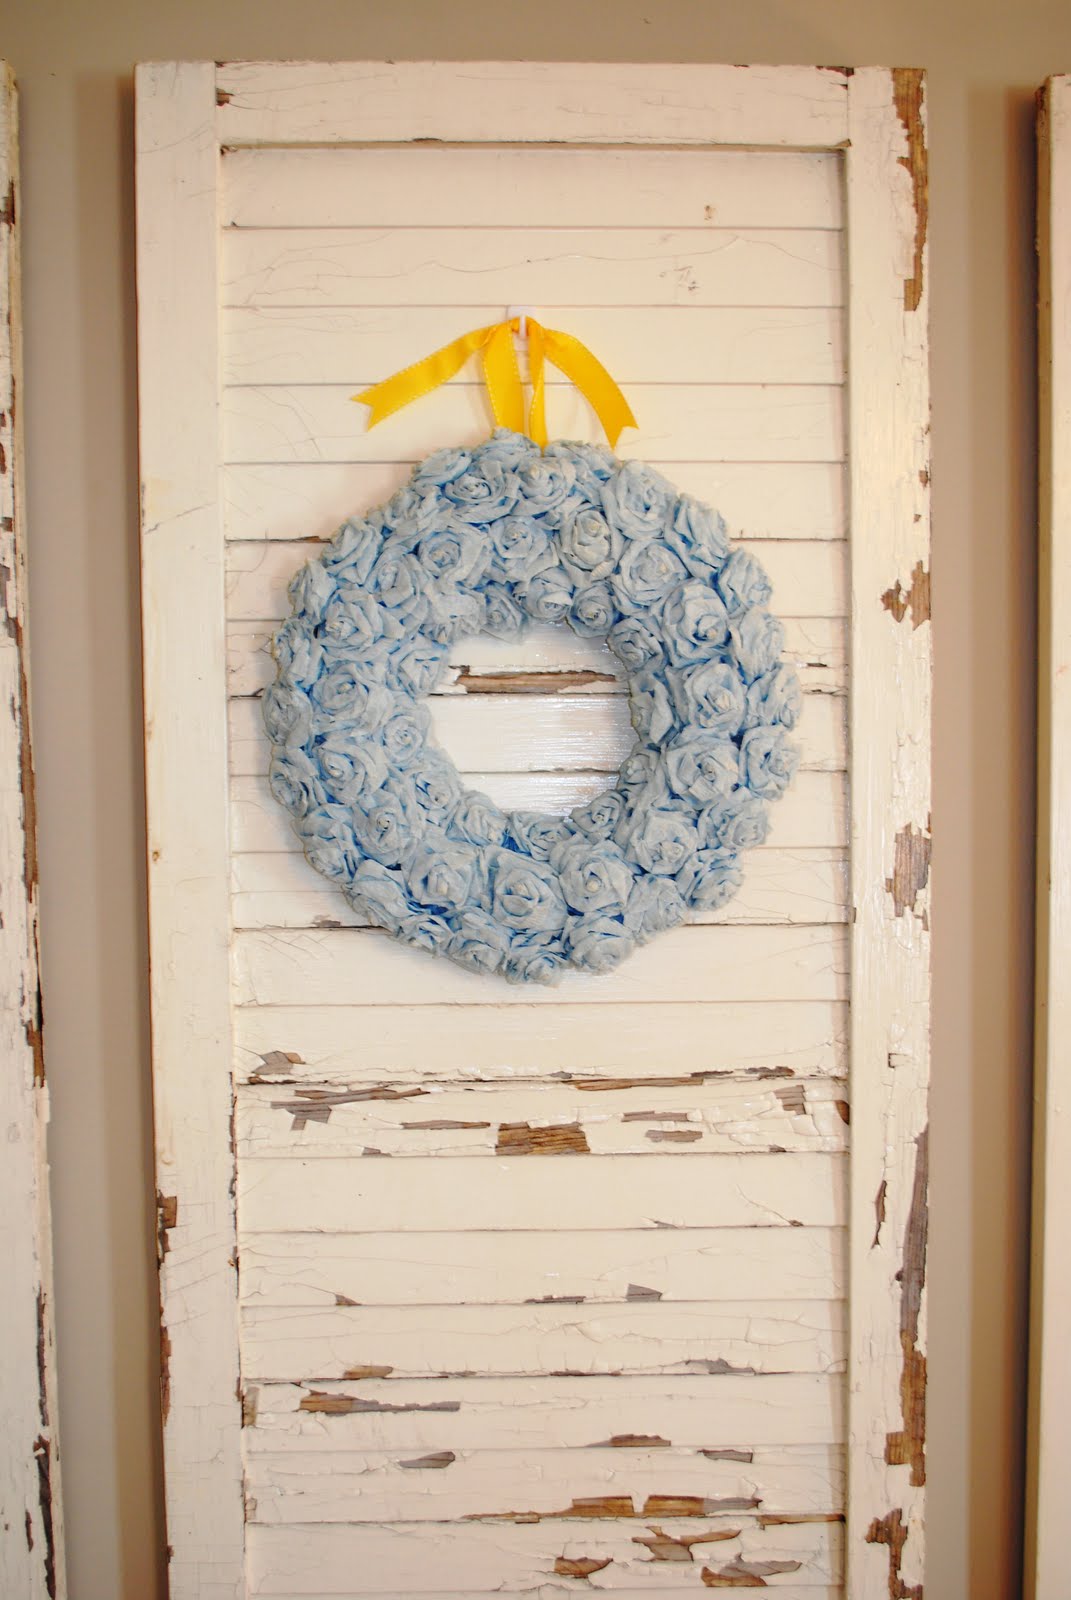
Rose Wreath
{photo credit}
{original tutorial here}

Ok, so I whipped out two packages of yellow and started making dozens of the paper rosettes. I used BOTH packages of crepe paper and didn't even cover the whole wreath. I definitely wanted it to be fuller like in the blue wreath photo above, but it'll have to do until I can find the same color paper somewhere else. It's really pretty in real life, has an amazing textural quality and is a perfect project for spring. 

I decided to put it in Ella's nursery on her dresser. Next to her mini chalkboard (you'll see project another day) and a little birdie from Anthropologie, which is actually a doorstop. So cute huh? Since I have a few packages left, I think I'll try my hand at the medallions next. It'll be perfect for my bestie (the bride to be) at her wedding shower this weekend.


That black shelf is going to get a makeover soon, it sticks out like a sore thumb. 
Try making one, and come back and leave a link in the comment section, i'd love to see it on your blog, or in your home!

April 19, 2011

{Pottery Barn Easter Door Sign-knock off}

Ok, next up in the "how can I get the Pottery Barn look on a budget" project list are these: the Easter Door/Yard signs. Aren't they cute? Yes they are, and expensive. I tried my hand at recreating one of these (the green bunny sign) and I think it turned out to be a dead ringer for the actual thing. 

Here's the actual Pottery Barn versions:


And here is my version. Total cost for this bad boy... .50 cents!!! yep, you read right, FIFTY CENTS!

How'd I do it? Well, I went to Home Depot and scoured the remanent section of the lumber dept (my new favorite place!) and found a scrap piece of plywood for .50 cents. The gentleman that worked there was kind enough to cut it down to 12x18 inches for me. 12x18 inches was the dimension specified on the PB website for the door hanger. The yard post was much larger but I opted for the smaller size.

As for the rest, I painted the board with Benjamin Moore's Urban Nature green. The color is part of BM's paint line for Pottery Barn. I already had it on hand, so i'm not including it in the project cost. 

My camera and the lighting outdoors when I took this picture really distorts the color. I'd say its a dead ringer to the green on the actual sign, somehow it didn't translate well in the photograph. Here's the swatch from the website:


See, its really close to the actual sign's color. All the other paints I used were just your run of the mill craft paints I already hand on hand (not included in the cost either). I printed a picture of the sign off the internet, blew it up on my copier, and used it as a stencil to fit the size of my wood, then I just painted away. I'm no painter, but I think I did pretty good! 

When everything was painted and dry, I took some sandpaper and lightly distressed some areas of the sign, like the PB one (again, my camera makes the distressed areas look really harsh, their more subtle in real life). I haven't yet, but I plan to spray the whole thing with a light coat of polyurethane to ensure it stays in good shape for years of use. 

Overall, the project was fun, I love the way it looks on our door, and I think I may just try my hand at the other "egg hunt" sign.

Again, The Pottery Barn version:

My .50 cent version!


Happy Easter!