Showing posts with label 4th of july. Show all posts

June 26, 2012

4th of july pinwheel tutorial

Today I'm sharing a quick and easy tutorial for making 4th of July decorations. Pinwheels are fun, simple to make, require basic supplies, and are perfect for last minute procrastinators, ahem...like myself. I made two sizes of pinwheels, a 12 inch and a 6 inch. Both are fun, but the large ones really make an impact. I chose not to put stakes on mine, but if you'd like to line your driveway or use them as festive cake toppers just tape a bbq skewer onto the back. 
Happy decorating! 

July 1, 2011

{4th of July Pin Tutorial}

Today I have a fun tutorial to share with you, just in time for this weekend's holiday. It's the  "4th of July Pin" tutorial, and it's so easy they're no excuses not to make one. 

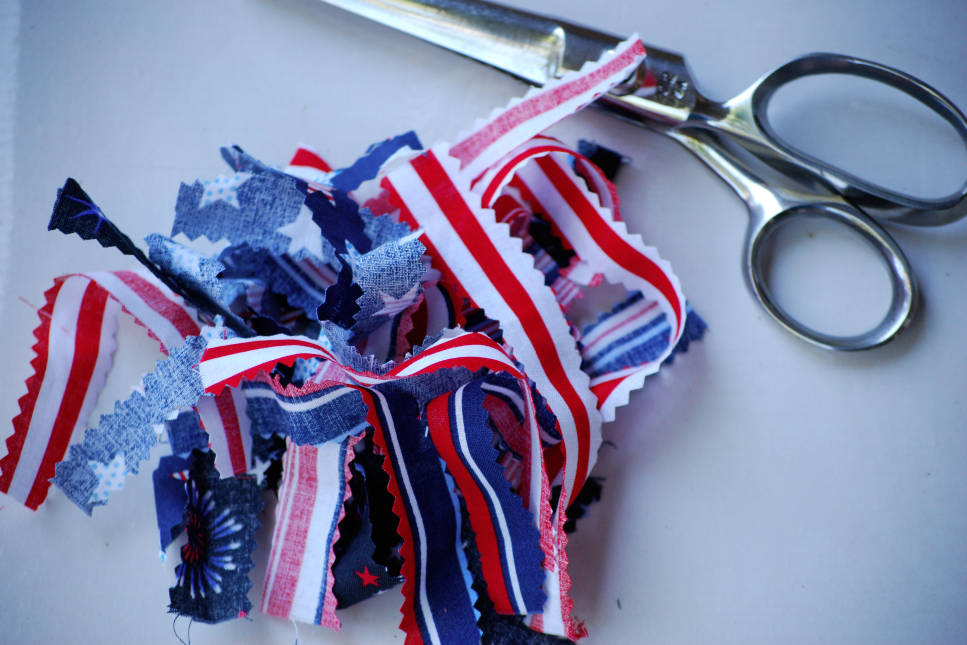
Step 1: Cut out strips of fabric approx 1/2 inch wide. There is no real exact science to this, so if some are wider or narrower, no big deal. I used 4 different 4th of July themed fabrics, but you could use just one or two. Use whatever you have on hand.

Note: I used pinking shears to cut my strips, but you can use regular if you'd like. Pinking shears help keep the fabric from fraying, but I've done this with regular scissors and the pin actually looks really cute with slightly frayed edges. 

After you cut out your pieces you'll have a big pile of strips. I cut 5 strips from each of my fabrics, for a total of 20 strips, so if you're using just one then cut 20, 2 fabrics cut 10 of each, etc...

Step 2: Pinch the center of your strip and sew with a needle and thread through the fold, as pictured above. Just keep folding your fabrics and putting them on your needle. You'll have a big bunch of fabrics on your needle like the picture below. (Click on the pic, and if you look closely in the middle you'll see the needle.)

Push the needle back and forth through the center of the fabric bunch a few times to really secure them all together. Knot off your thread. 


Step 3: Use hot glue to affix a pin back to the back of your pin. 

Now flip over and admire your work, you're done!

I do have to give a big thank you to Christa from Mustard Seed Fabric & Furniture for sharing how to make these with me. She sported one at our Thursday Night Market last week, and was kind enough to give me the details on how she made it. Thanks Christa!

June 30, 2011

{4th of July Wreath}

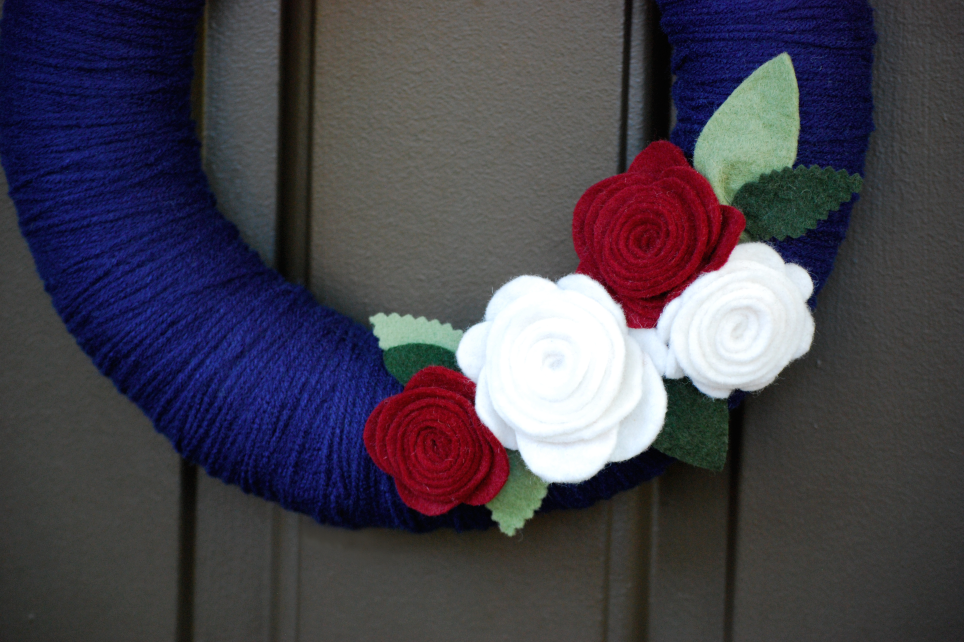
The Fourth of July is one of my FAVORITE holidays. I love the hot summer nights, the fireworks, grill outs, and everyones generally happy, laid back moods. Since we've moved back into an apartment I've been struggling to find creative ways to put my own stamp on the place.  Painting is out of the question, and I'm limited on space, so accessories are my go to decor. You may remember the crepe paper wreath I made, it hung on our front door until recently when it was replaced with this beauty...


I wanted something that was 4th of July-ish, without being overly 4th of July-ish (if that makes sense). I envisioned using red, white, and blue, but in more muted tones, and not in the traditional stars and stripes fashion. 

Here's how I made it:
I bought a wreath form from Michael's, and wrapped it in navy yarn. I'm not gonna lie, wrapping it completely so that none of the styrofoam shows is kind of a monotonous process. Every few inches I used a hot glue gun to tack the yarn down. After everything was sufficiently covered then I made a few flowers out of red and white felt and hot glued them to the wreath. I just eyeballed their placement, and glued them where I thought they looked best. I also cut a few green leaves out of felt and glued them under the flowers. I used regular scissors and pinking shears on the leaves to add a bit of dimension to the whole thing. That's it! Easy, easy, easy!


The pictures don't do it justice, it's really a pretty wreath, and looks great on our door, and adds just the right amount of festiveness. I'll be leaving it up the whole month of July, and am already brainstorming the next one i'll make for late summer/early fall.